


Sound Tutorial Andrew 15 September 9-12h
This tutorial will introduce you to the art of recording and listening to sound. We will work with a simple audio set up to make field recordings, and discuss how such material might then be developed into fully-fledged soundscapes for this unit’s FSA
Prepare your equipment
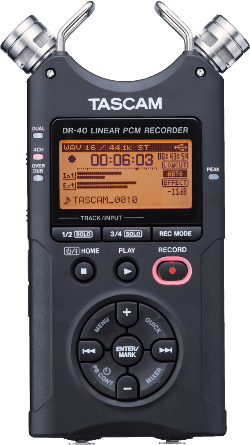
Prior to the tutorial session, you are expected to familiarize yourself with the TASCAM DR-40 audio recorder and external mono microphone that are included in the camera kit. The following guidelines are not intended to be exhaustive; rather, they will direct you to the areas of the manual most relevant for our purposes (and provide a few additional pointers). For complete instructions, please reference the manual available from Tascam’s website . You can also consult YouTube tutorials such as this one . And remember, the best way to learn anything is to experiment!
1. Setting Up
Headphones: As microphone capsules create sound very differently from your ears, when recording be sure to always use headphones.
Microphone position: When recording wide-shots, spread the microphones to the left and right (“A-B position”):
For more directed recordings that still produce a stereo image, consider changing to the closed (“X-Y”) position. For details on this, see Manual pp.33-34. In general, for field recordings you are recommended to stay in the A-B position in order to create a defined stereo image.
Recording mode: Set to stereo (see Manual pp.43-44).
File Format, Bit Depth, & Sampling Frequency: In digital audio using pulse-code modulation (PCM), the number of bits of information in each sample is called the “bit depth.” Bit depth affects everything from signal-to-noise ratio to dynamic range (the ratio between largest and smallest values); you can think of it as analogous to image resolution. For maximum quality, you should select WAV 24-bit (see Manual pp.36-37).
Sampling frequency refers to the number of audio samples taken every second; similarly, you might think of it as a kind of audio equivalent of frame rate. As 48kHz is the standard sampling frequency for use with video, you are recommended to choose this (also see Manual pp. 36-37).
Where to save files: See p.67 onwards for details on file/folder structure. Coming up with a proper storage system will help you edit more efficiently.
2. Recording
Turning on: See Manual p. 45. Important: DO NOT FORGET TO PRESS THE RECORD BUTTON TWICE! It is also a good idea to turn on “Pre-Record” (see Manual p. 59).
Adjusting input levels: For details on how to adjust levels, see Manual pp. 39-40. Setting input levels—the strength of your incoming audio signal—is one of the most important things you will do during recording. Too low and you will get a really quiet end product; while volume can be boosted in post, doing so will also dramatically increase the amount of noise. Set your levels too high, by contrast, and you risk “clipping,” where the signal is attenuated and sound distorted. As a rule of thumb, try to keep things around the -12db level. Do NOT, under any circumstances, use “auto levels.”
While in a dynamic sound environment you will want to adjust your levels on the fly, avoid “riding the levels” during a sonic event you wish to record (this cannot be easily fixed in post). If working in high dynamic range environments (for example, a building site with lots of sudden, loud events), consider using a limiter to prevent clipping (see Manual pp. 43).
Handling Noise: To avoid handling noise, you should use the screw-in grenade grip included in your pack. As the level controls are buttons, changing the levels will also produce handling noise; be conscious of this during recording. Remember, garbage in, garbage out!
3. Using External Mics
Your pack includes a Sennheiser K6 powering module and a ME 64 cardioid microphone. These are particularly useful for recording interviews on the run.
In-Class Exercises
After setting up your audio recorder, we will spend the next 10-15 minutes troubleshooting any issues that came up; next, we will discuss parameters that can structure your approach to recording. After this we will head to the station where, in groups of 2, we will spend approximately 45 minutes on the following exercises:
- Listen, strictly without talking, for at least 5-10 minutes.
- Record 2-3 static ambiances from different positions in the space, max 2 minutes each. Use the Tascam in X-Y pattern.
- Record 2-3 “sound walks” through the space, of no more than 2 minutes each. Use the ME64 Cardioid.
- Seek out and record 2-3 discrete sonic events or process, max 2 minutes each. Use the ME64 Cardioid.
Be sure to record each block of 2-3 recordings as a single file (doing otherwise will make selecting tracks to play back difficult). While recording, you should focus in particular on 1) setting appropriate levels (but not “riding the levels” excessively), and 2) avoiding handling noise.
Next, we will return to the classroom to listen back to and discuss some of what we recorded (and how we felt doing it). What do we hear, in terms of both objects and recording parameters? How well recorded is it, and how can this be improved? How might we construct larger “soundscapes” from such materials? This will also provide an opportunity to revisit any issues you have with recording. Please note that due to time constraints, it may not be possible to listen to recordings by everyone; be sure to listen back to your own recordings later.